Okta SSO Integration Guide
Introduction
This document walks through the steps required to integrate Okta as an identity provider for Frame AI. This means Frame AI will trust Okta to authenticate users during the Frame AI login flow. Authorization and user management are then handled by Frame AI administrators in the usual way.
This process requires coordination with your Frame AI Success account representative.
Overview
The steps of this document cover the steps to implement Okta login support for Frame AI. These steps include
-
Creating your Okta application used to integrate with Frame AI
-
Sharing SSO configuration data required by Frame AI to configure Okta SSO
-
Deploying and testing your Okta configuration)
Create your Okta application
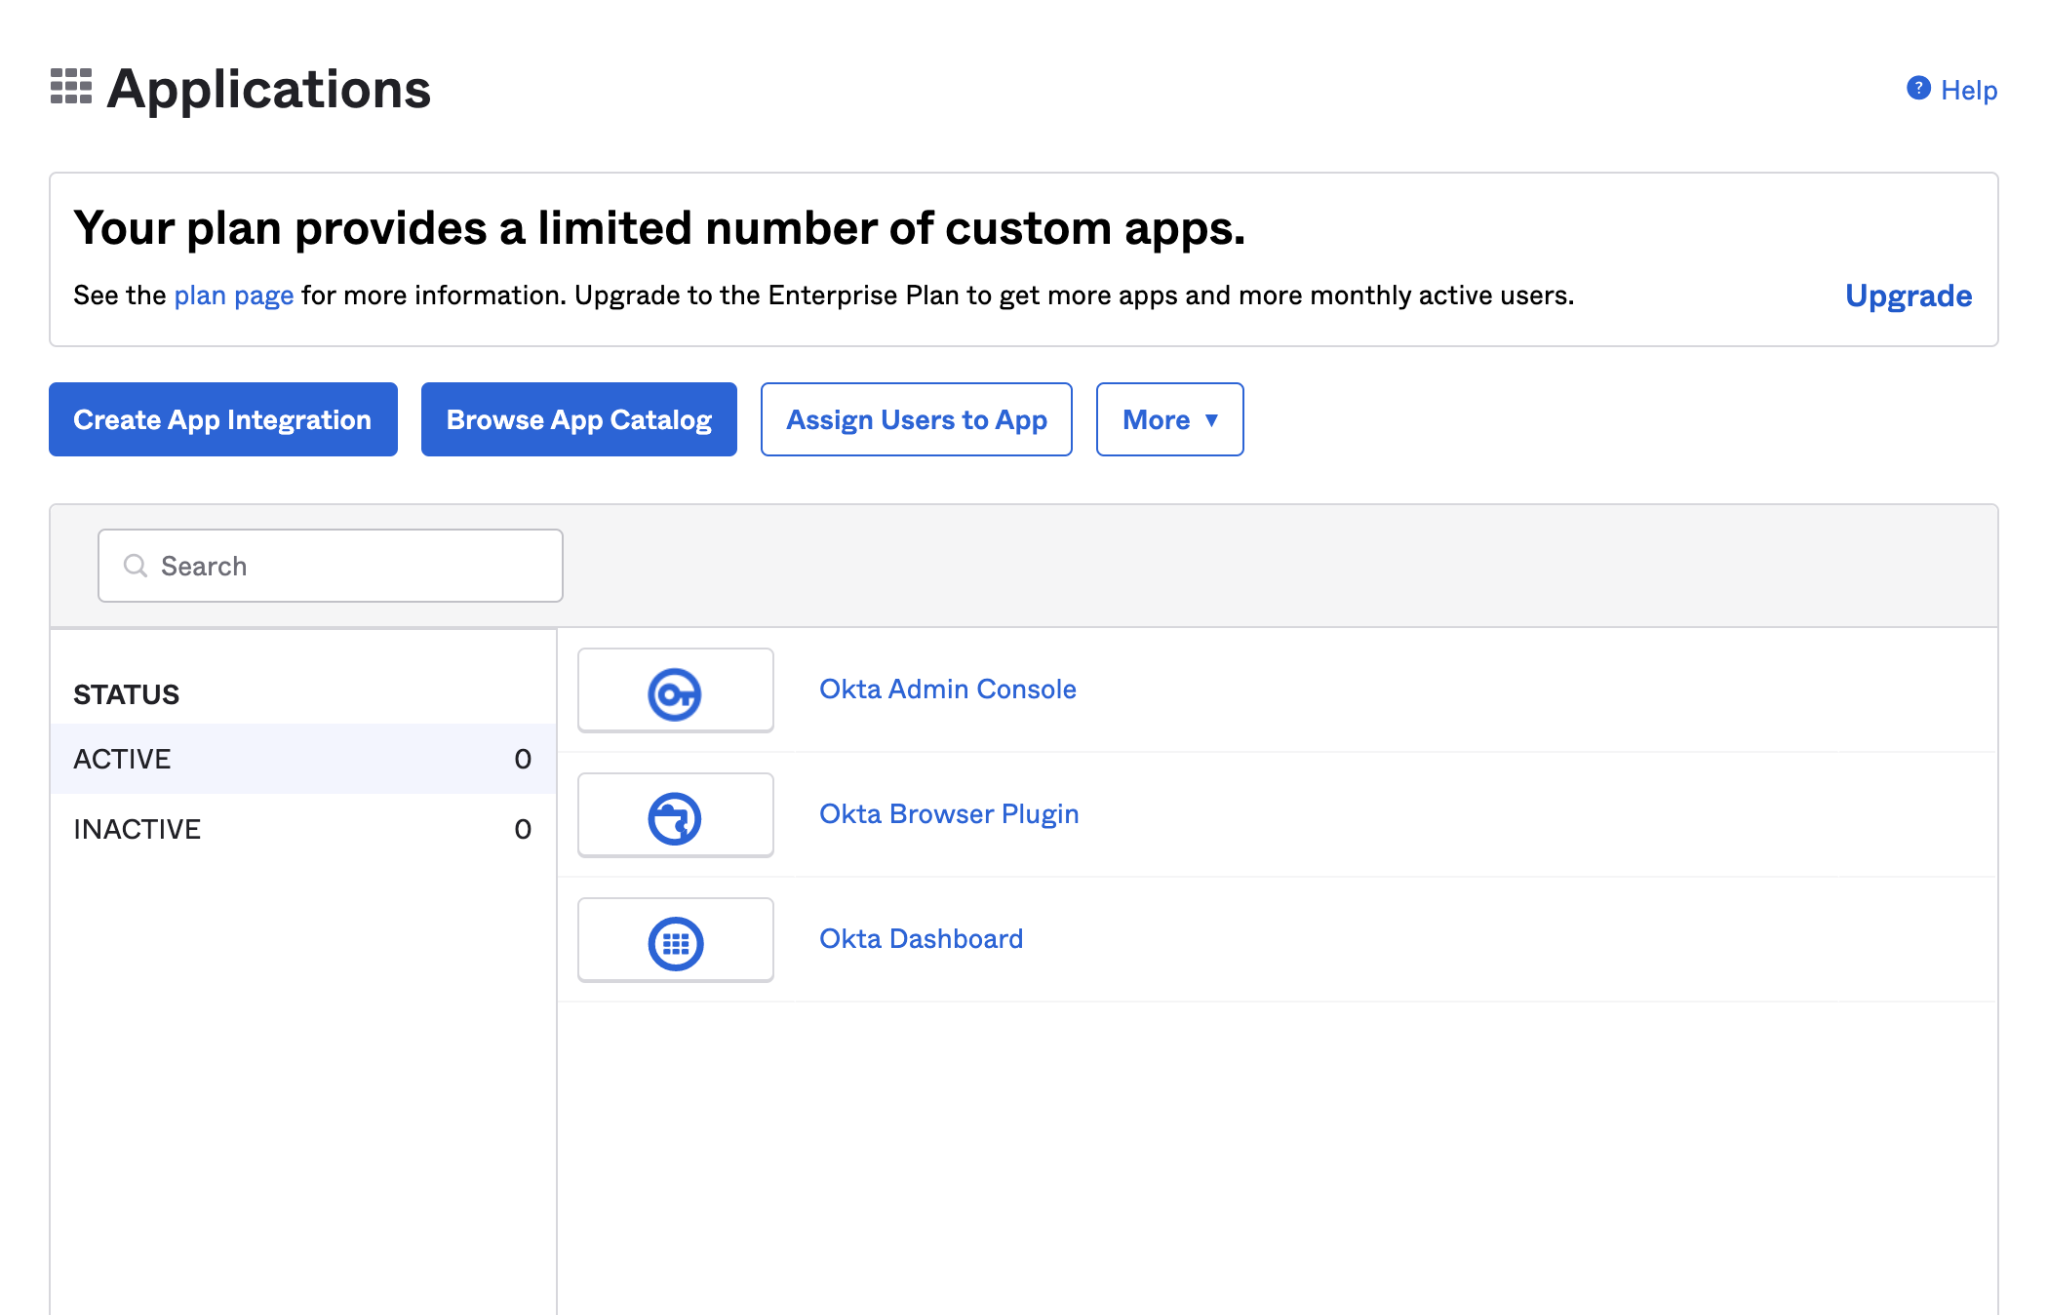
Sign in to your Okta administration console and go to the applications section at
| https://${yourOktaDomain}/admin/apps/active |

Okta Applications
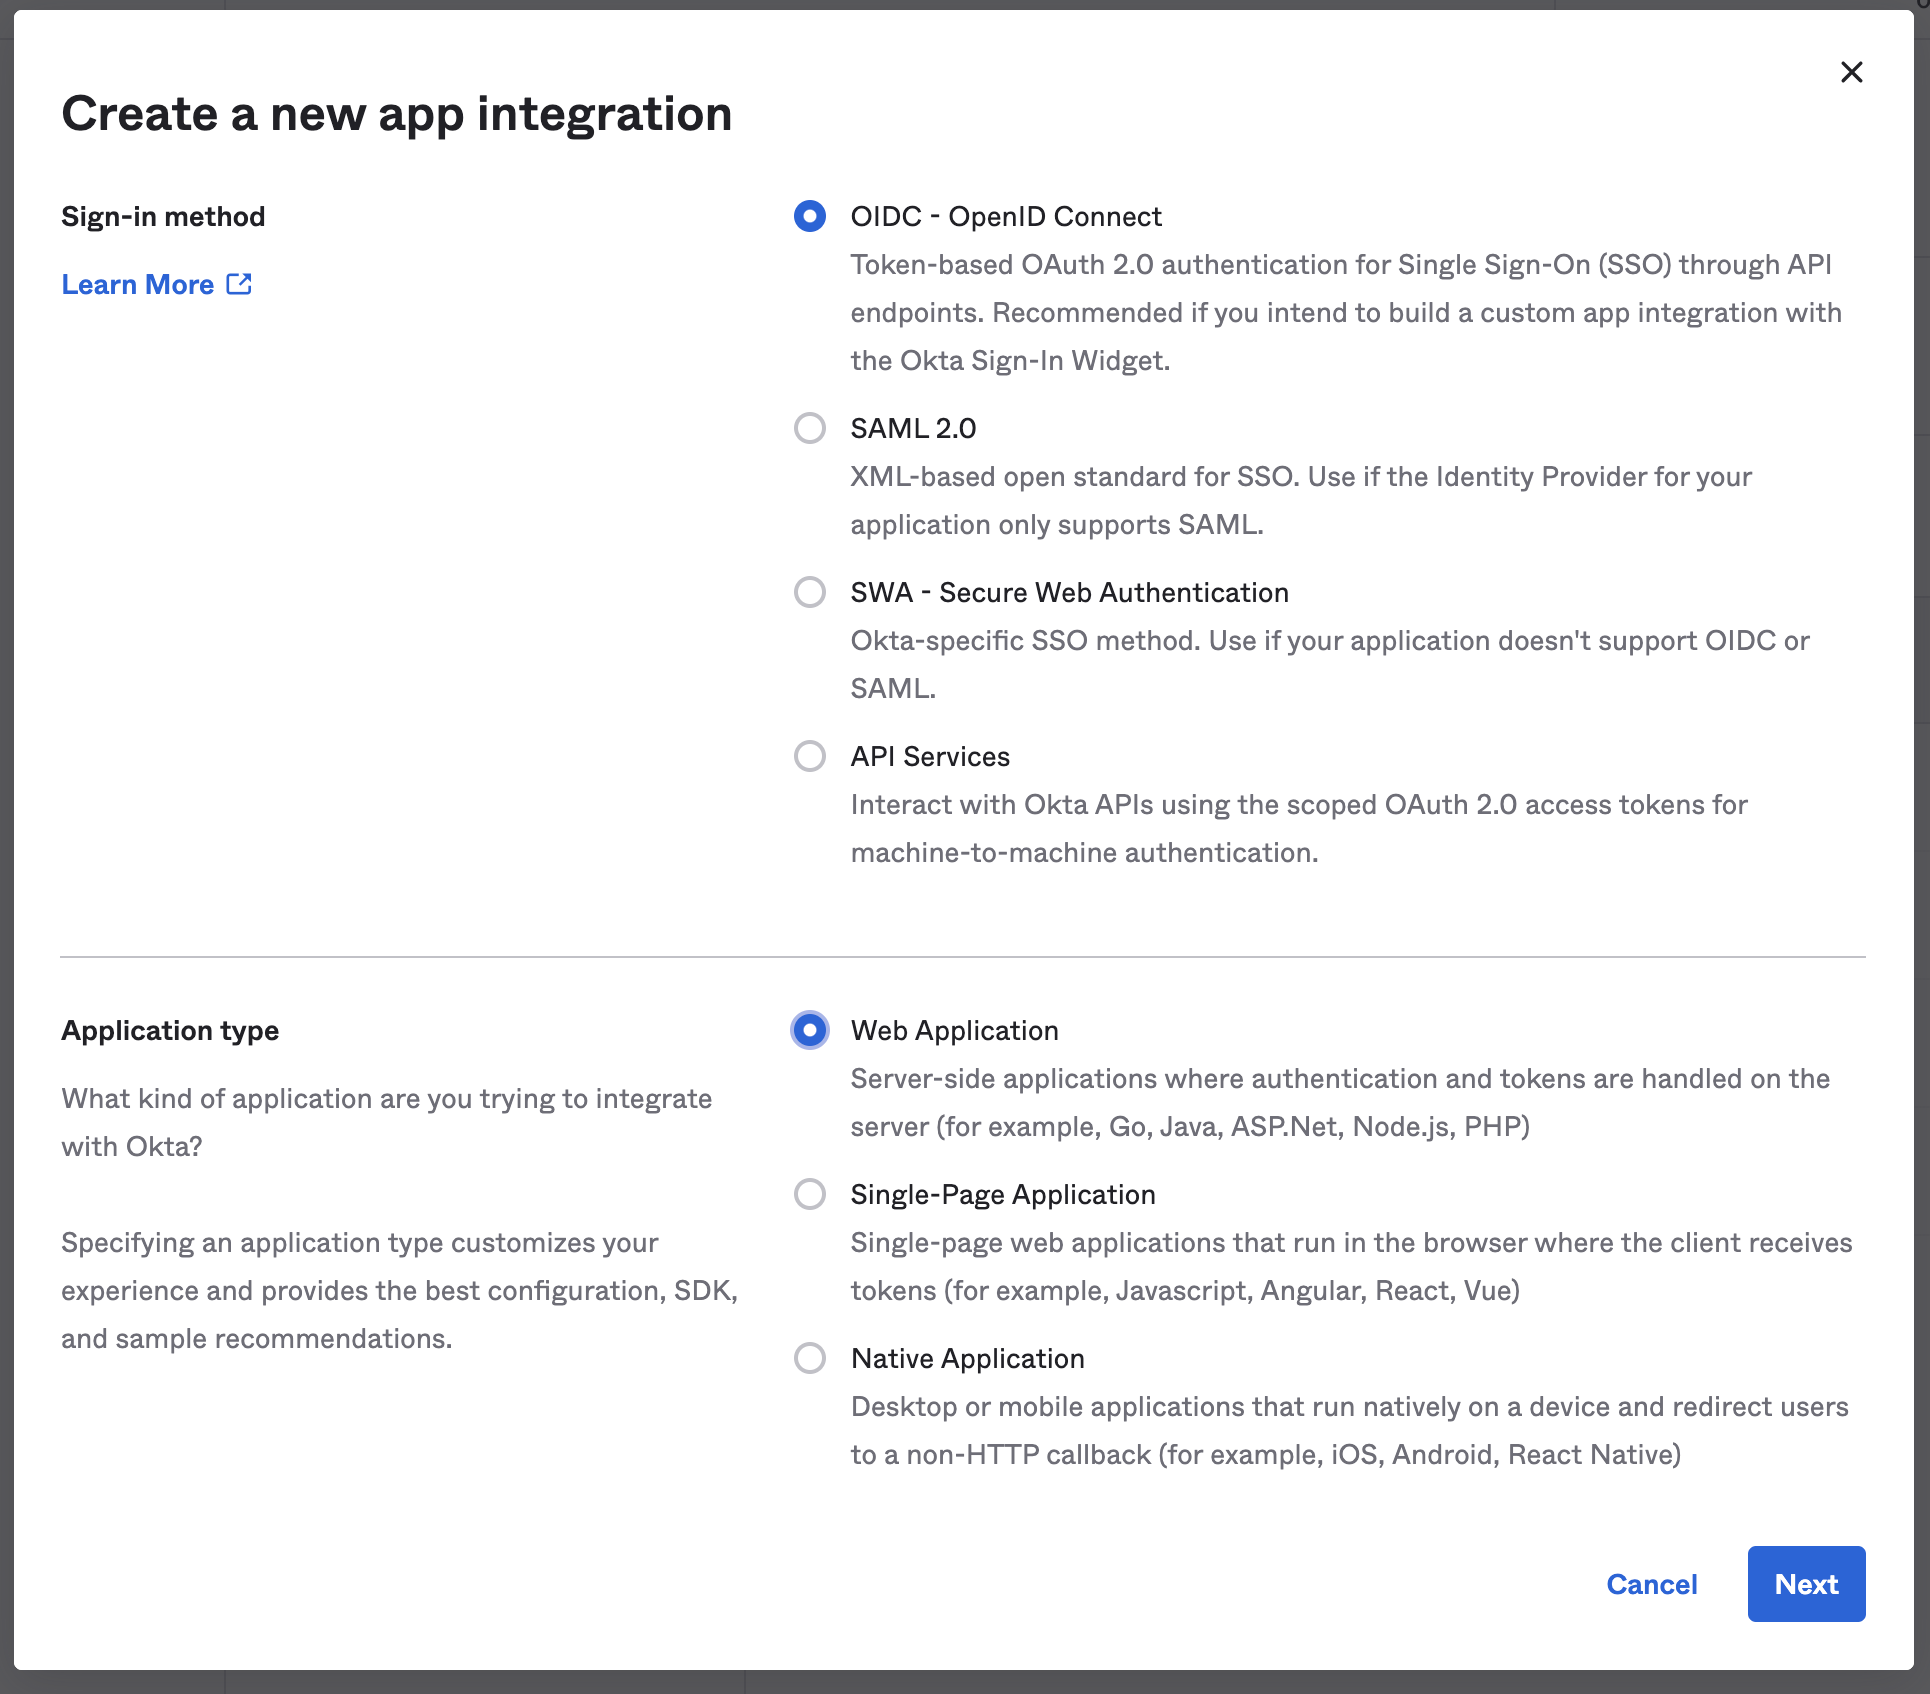
Click on "Create App Integration" and select “Sign-in Method” as “OIDC - OpenID Connect” and “Application type” as “Web Application” and click “Next”.

Create a new app integration
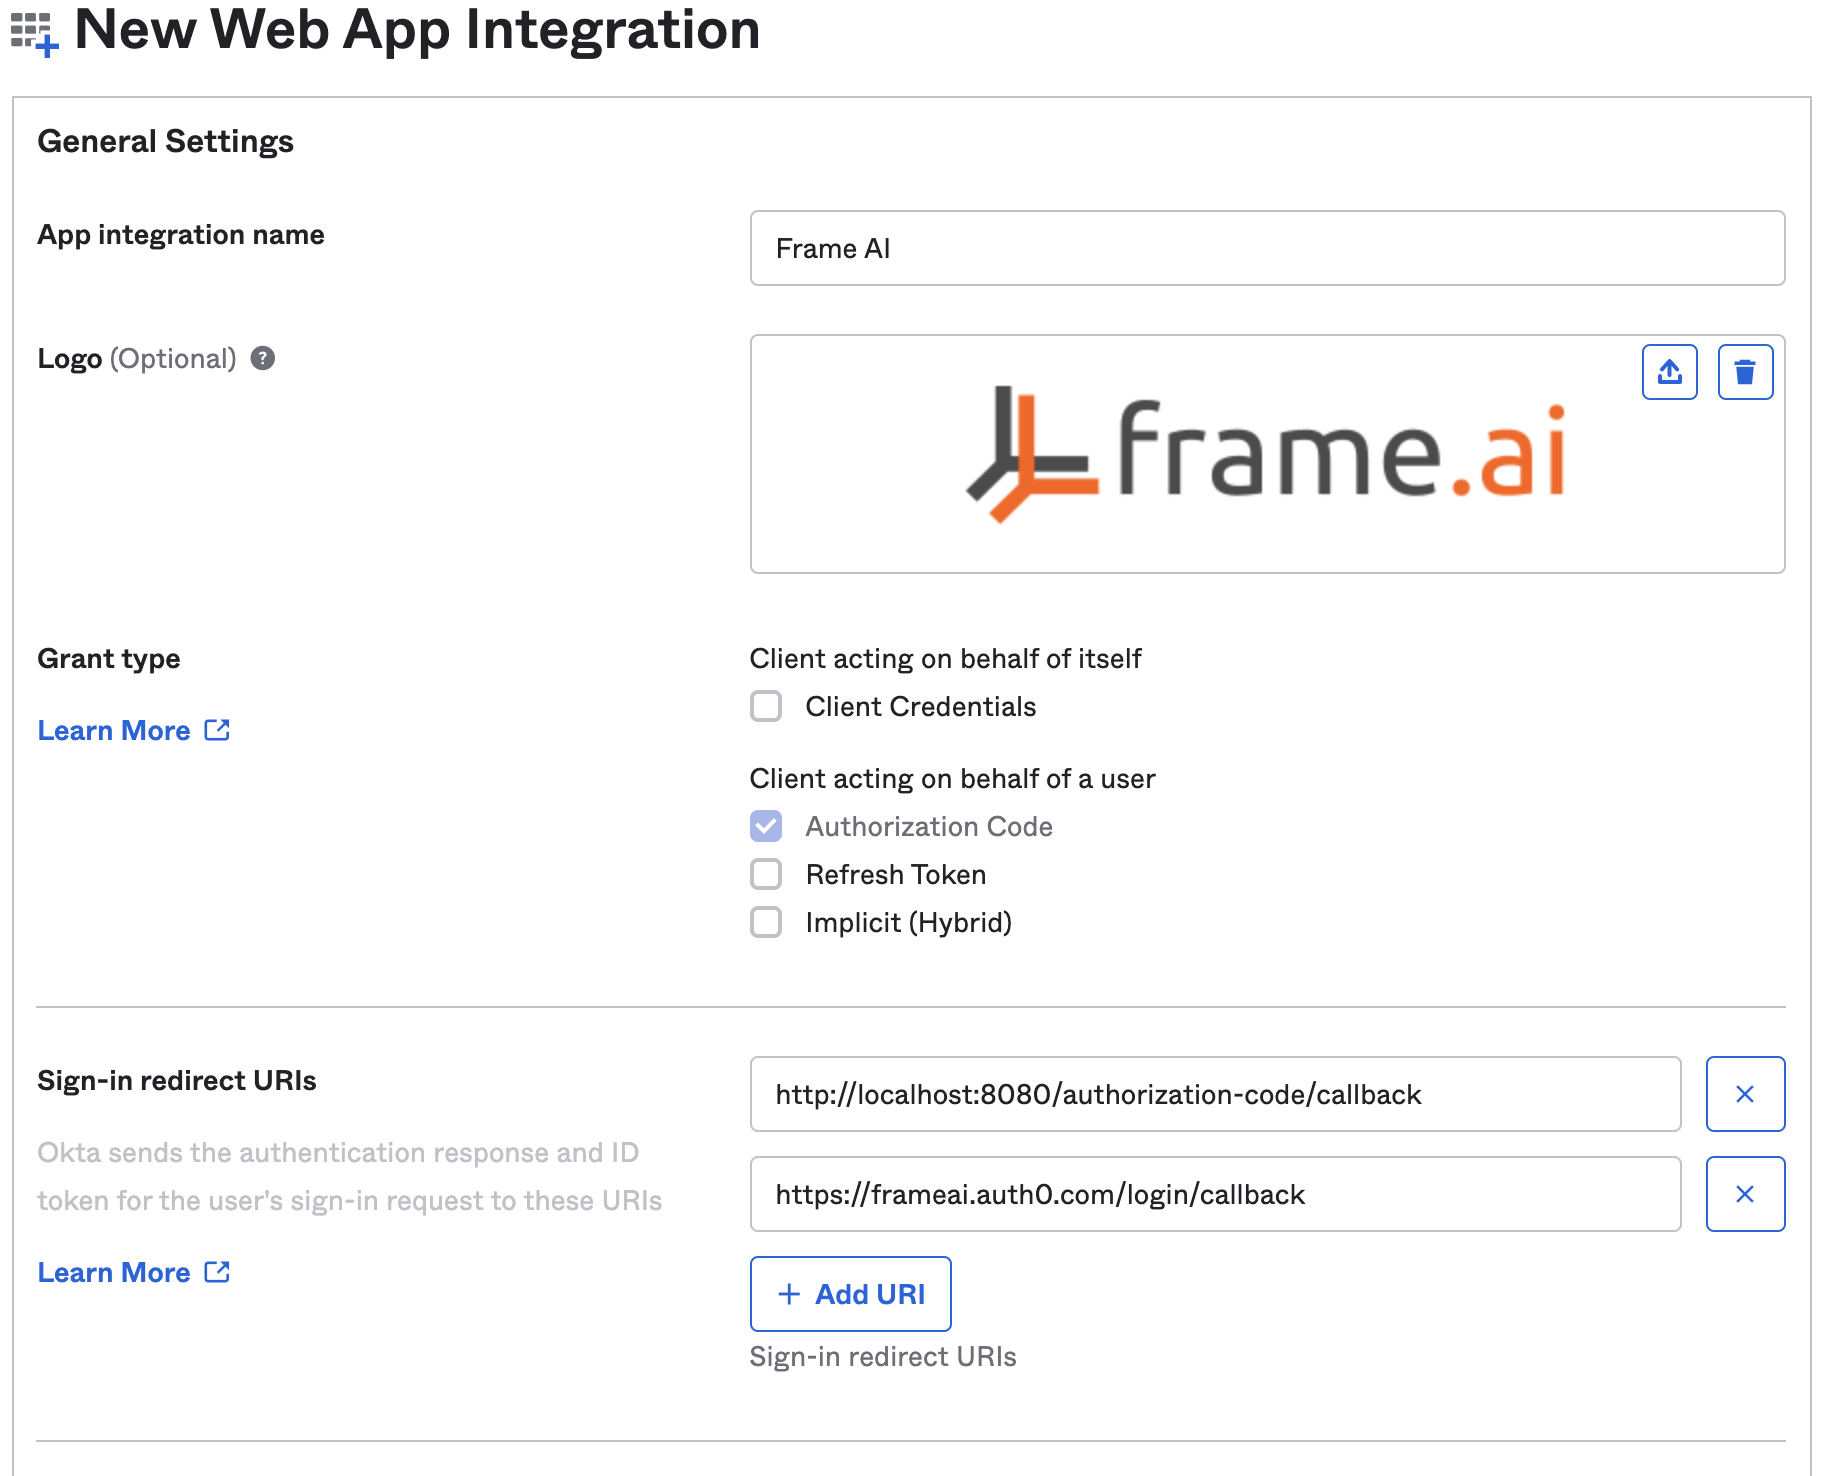
Configure the application name and add the sign-in redirect URI. You may obtain a logo at https://frame.ai/images/[email protected].
| Sign-in Redirect URI |

New Web App Integration
Under the "Assignments" section you may grant everyone access to Frame AI or you may configure custom policies for access. Note that this will control only users authorized to sign in to Frame AI using Okta. Access to specific conversation data repositories is managed by the respective administrators for those Frame AI instances.
Share SSO configuration data
Frame AI requires the following data to configure Okta SSO on your behalf. Note that for each value we give examples, but make sure to double-check that you are sharing the correct values from your own Okta instance. In some cases, customizations in your Okta instance may cause your values to deviate from the examples.
| Field name | Where to find it | Example value |
| Authorization URL | The example is a template for the default authorization server. Your instance may use custom servers configured at
https://${yourOktaDomain}/admin/oauth2/as | https://${yourOktaDomain}/oauth2/v1/authorize |
| Token URL | Should use the same Base URL as the Authorization URL. | https://${yourOktaDomain}/oauth2/v1/token |
| Userinfo URL | Should use the same Base URL as the Authorization URL. | https://${yourOktaDomain}/oauth2/v1/userinfo |
| Client ID | The application Client ID identifies your Frame AI application in Okta. It is not a secret.
Visit the applications console and click into the details of your Frame AI application to access this value. https://${yourOktaDomain}/admin/apps/active | 0oa1mr98x6XSP1idg5d7 |
| Client secret | A secret key used to perform cryptographic verifications during logins. Do not share this key using unsecure methods.
Visit the applications console and click into the details of your Frame AI application to access this value. https://${yourOktaDomain}/admin/apps/active | BtBHUEgzdhiVKeqGPbKF2PHo0WH_Kj5_CKzR79Bh |
| Authorized domains | A list of email domains you would like to restrict to have access to your Frame AI domains. Users at these domains will be required to use your SSO provider.
In order to complete this request, note that Frame AI will require receipt of an SPF and DKIM verified email from a user at each of these domains requesting that they be added as authorized domains for your account. | frame.ai |
Frame AI will send you a secure Google Sheet to collect the above values. The sheet is protected using Google Workspaces access controls, which uses a variety of security methods including Google SSO and verification using access codes sent to a user’s email address.
Coordinate with Frame
When you've completed the steps above, request a Google Sheet from Frame AI Success staff.
Deploy and test your Okta configuration
Your Frame AI Success representative will coordinate the release date for your SSO configuration. After that time, you will be able to confirm that you can log in successfully using Okta. Frame AI will troubleshoot any issues and share relevant error codes returned by your Okta instance for debugging purposes.
Updated over 3 years ago